
This article is a collaboration between Sally Creagh (Learning Design & Technology Specialist, FEIT) and Ahmed Al-Zubaydi (Associate Lecturer, School of Mechanical and Mechatronic Engineering, FEIT).
Many of the world’s most useful inventions are historically the result of incremental improvements made by backyard tinkerers on a foundational idea, rather than the result of a single, fully-resolved design.
In FEIT, we have been trying to solve the lockdown-induced problem of needing to live stream or pre-record videos of highly hands-on activities normally done in face-to-face labs and workshops including:
- Demonstrating how to use electrical, mechanical or biomedical equipment
- Annotating images of students’ hand drawn designs or calculations that have been posted to discussion boards
- Conducting experiments.
So in the spirit of DIY-ers everywhere, we wanted to see what we could achieve quickly, using only what we could find around the house, or easily acquire. This meant we would attempt to not purchase anything, or only items that could be found at a supermarket or hardware store.
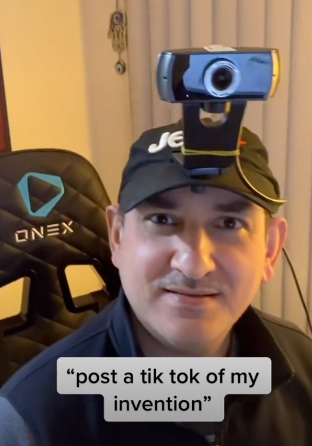
Camera-hats
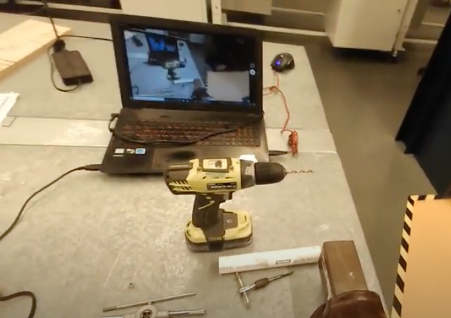
A sturdy baseball cap was adapted to hold a web camera using the hardware from a tripod, attaching it via a nut and bolt through a hole in the brim. We used the free software Iriun on the computer to recognise the webcam as a second camera, which enabled live streaming on Zoom or MS Teams. This demonstration of a manufacturing technique called ‘tapping’ was shot using this camera-hat.
The camera bike helmet
What if you don’t have a tripod or external webcam? Our next iteration was a bike helmet rigged up with some cardboard and rubber bands to hold a smartphone in place at the correct angle for hands-free streaming – allowing the academic’s point-of view to be captured as well as allowing free movement. The rubber bands were extended by looping them together, they were then threaded through the holes on the helmet. Triangles of cardboard were added one-by-one until the correct angle was achieved so it was comfortable for the wearer. We used the Iriun app again so the smartphone could be recognised as a second camera.

The camera bike helmet 
Each triangle of folded cardboard adds approximately 15° difference to the angle of the smartphone. 
Rubber bands – the secret weapon of teachers in lockdown everywhere.
Why not just use a GoPro camera?
Firstly, a GoPro is not a commonly owned household item. The first attempt at using the webcam to approximate a GoPro involved attaching it to a pair of protective lab glasses with rubber bands, but this was cumbersome, lopsided and interfered with the wearer’s vision.
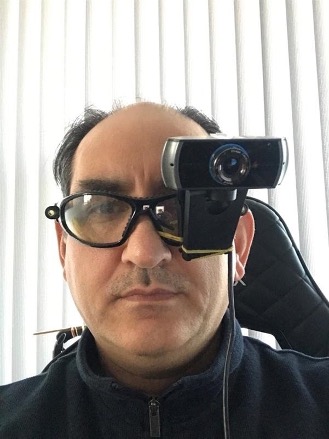
The camera hat is a superior solution. Additionally, when you use Iriun you can see what you are streaming on the computer monitor, which you can’t do with a GoPro set up. Also, the camera hat looks great on!
Suspended camera
Next we wanted to be able to have a second camera in a fixed position for demonstrations or pencasting at desk-level.
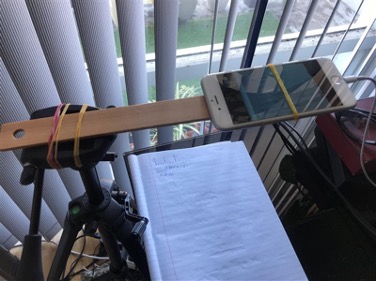
The smartphone suspended on a ruler. 
From this angle, you can use the smartphone for pencasting videos.
This version uses a tripod, a ruler and rubber bands to suspend the smartphone at the correct level. You could also have the ruler protruding from a shelf weighted down by books. This setup is very useful for streaming quick drawings, notes, calculations or mind maps while you are giving a workshop. More detailed instructions can be found in this video.
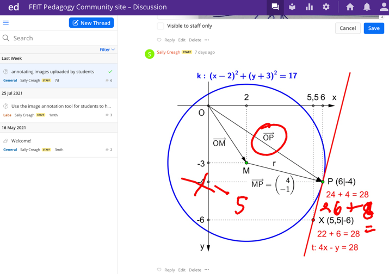
Live streaming annotations of student generated images
The next task was to be able to do live annotations of students’ sketches or other hand-drawn material uploaded to Canvas. For this we used a smartphone suspended from a desk lamp with cardboard and rubber bands over an iPad opened on a Canvas or Ed discussion page. Annotations were done using a stylus pen.

Raw materials – smartphone, cardboard and rubber bands. 
The smartphone attached to a lamp for suspension.
For Canvas discussion pages, you will need to tap on the uploaded image and move it to your photo editor, annotate then repost it to the discussion. It takes a few steps but it works. If you use Ed as your discussion tool in Canvas, you can annotate right in the comment thread without having to move the image as it has an annotation tool built in. Step by step instructions for Canvas and Ed annotations available here.


Feature image by Mohamed Hassan.
For those having trouble with the link to the step-by-step instructions here they are:
How to annotate an image in Canvas discussion with an iPad and stylus:
1. Go to Discussion and the relevant thread
2. Open comments and press on the uploaded image until the options menu pops up
3. Click add to photos
4. Go to Photos app > Recent
5. Press the image > Edit > Markup (the Markup icon is a pencil head inside a circle)
6. Annotate > Done > Done (the annotated image is now in iPhotos)
7. Go back to Canvas discussion
8. Click ‘Write a reply’
9. Attach > Choose file > photo library > select the annotated photo > Use > Add text if you want > post reply (this will embed the image in the discussion reply field.
More information here: https://community.canvaslms.com/t5/Canvas-Question-Forum/Annotating-over-Embedded-Images/td-p/239945
How to annotate an image of hand-drawn designs/calculations/ formulas on an iPad with a stylus using ED discussion:
1. Ask students to post an image of their design/calculations on ED as an ‘answer’ to your ‘question’ post
2. Click the three-dot menu in the bottom left corner of the image
3. Edit
4. Add annotation
5. Click on the image
6. Annotate the image > Done
7. Save
The annotated image has been posted in the thread under the original image.
Now am explain the idea to the students who need to scan their work for e-submission
Love the innovation, great work!
Cool ideas and fun here thanks!