I love to cook, but reading recipe blogs is tedious. Often you need to read through the blogger’s life story before you get to the recipe – that’s why I’m always scanning for the ‘Jump to recipe’ button you often see at the top of posts.
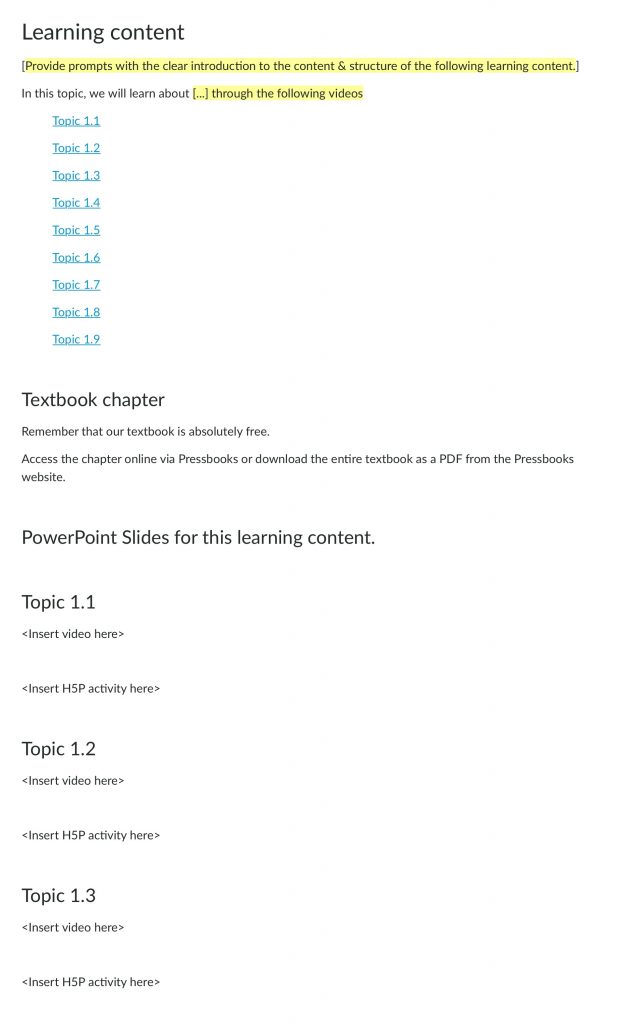
This handy tool got me thinking about my Canvas pages for my students. Each of my topics has a learning content page that contains readings and PowerPoint slides, then a series of short chunked videos and interactive H5P activities. Even when editing these pages, I found scrolling down the page to get to the section I wanted tedious – so I imagine that it is the same experience for my students.
This is where recipe blogs gave me an idea! Why not use the same ‘jump to recipe’ principle in our teaching materials?
Set up your page
Some searching and discussions with my full-stack developer husband led me to something called anchor tags. This gives you the ability to create a table of contents, with hyperlinks to the various sections of your Canvas page.
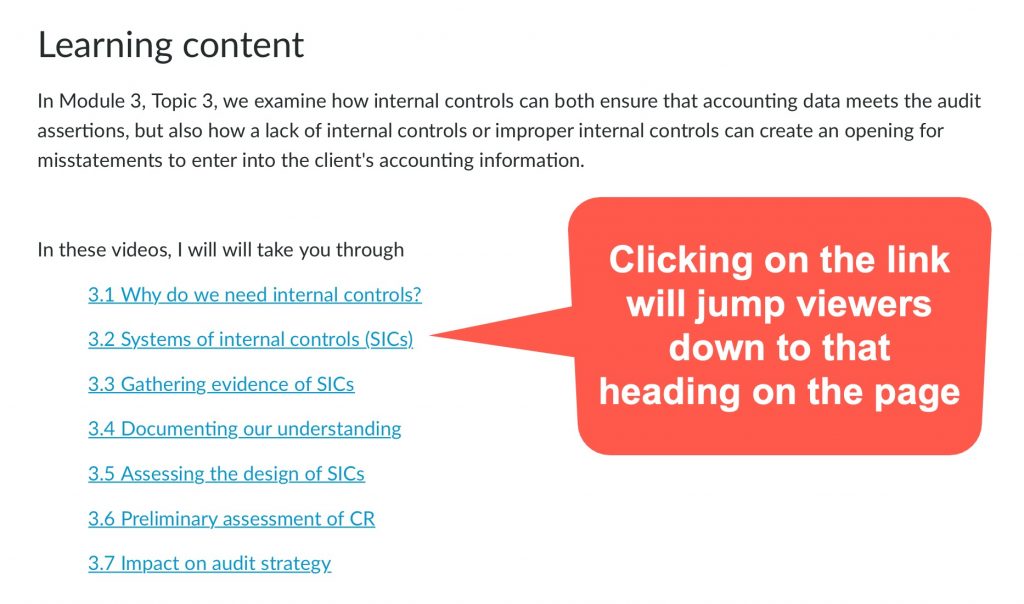
If you’re already following UTS’ Accessibility Guidelines, then you’ll be using headings and subheadings correctly in Canvas. Once you have your headings in order, create a table of contents at the top of your page listing each of the headings that you want to be able to ‘jump’ to.
Create anchor tags and links
The next step is to link your table of contents to the specific headings. Unfortunately it is not a point-and-click exercise in Canvas and does require a little HTML editing – but if I can manage it, you can too!
I followed the instructions from this post in the Canvas Community about how to create these links within your Canvas page. Note they don’t use the term ‘anchor tags’ in the post (instead they say ‘links to Canvas headings’).
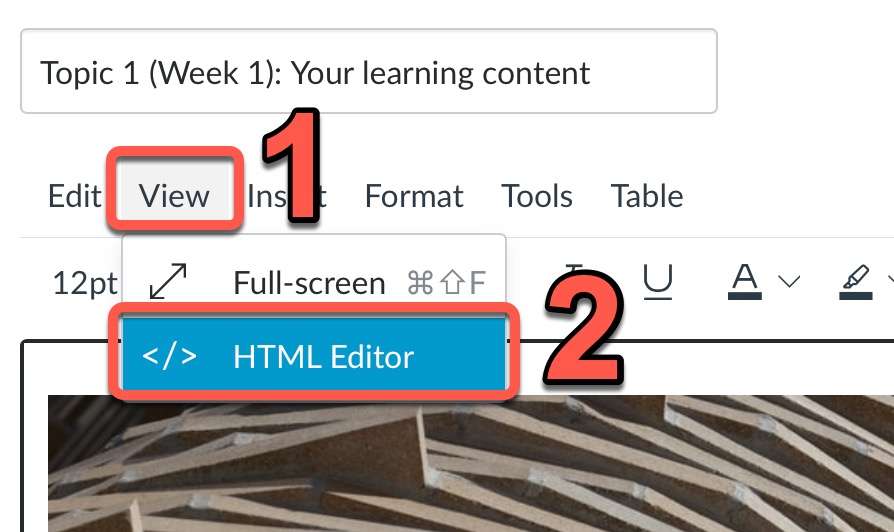
You’ll need to use the HTML editor in Canvas and conduct some basic HTML work – but I figured it out quite quickly.
Amanda’s tips
HTML editing can seem a bit scary – but hopefully these tips will assist.
- The anchor tag attached to your heading does not need to be the full heading name and title, e.g. ‘Topic 1.1 Introduction to accounting’ can be tagged as ‘Topic1_1’
- You can use the same anchor tag name on different pages – it doesn’t need to be unique. So you can have “Topic1_1” as the tag on multiple pages. The link will jump only on the same page; it can’t link to another page.
- If you wish to name your anchor tag with multiple words, you can’t leave blank spaces. Instead, use hyphens or underscores. (You can also use commas and periods but I tried that and found it very confusing to try and read the tags).
- You can pre-build a template with headings and anchor tags. Then as you duplicate it to create new pages/modules – you won’t need to worry about editing the HTML code! I’m constructing a brand new subject and I’ve create the template page below.