
We’ve discussed the many advantages of video feedback, particularly saving time and connecting with students. This time I want to talk about creating video feedback using Canvas SpeedGrader, and how I used free open source software to screen share student work as part of my video feedback.
I found this practice faster than writing text feedback and, I feel that I provided something of much greater value (and the feedback shows that students overwhelmingly appreciated this format too). My hope is to provide some inspiration and make it easier for you to pick up parts of this practice by discussing some of the practical considerations.
Accessibility comes first
Before going down this route, consider accessibility. Information in a video cannot be accessed by everyone, so it’s important to make sure that students get something that works for their needs. Explain to students that they will be receiving video feedback, and offer them the opportunity to request an alternative (e.g. text feedback).
It’s also important to consider accessibility for your teaching team. While you may be equipped for video feedback, it may not be appropriate to expect it of staff in your teaching team due to their access to support and equipment.
Using a standard webcam for video feedback
In this post I discussed how to get started with a framework for your personalised feedback. Here are some of the practical considerations.
Setup in Canvas
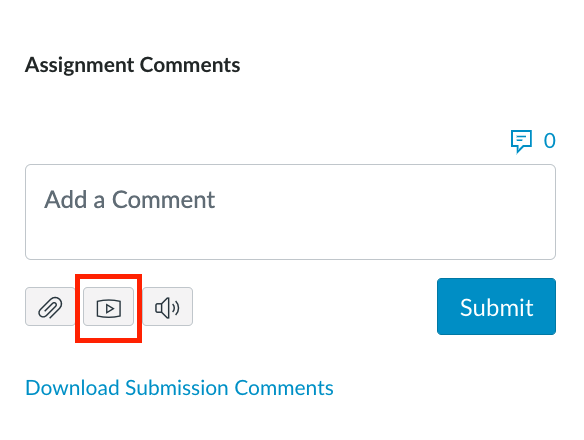
The technical setup for video feedback in Canvas SpeedGrader is straightforward. Clicking a button below the regular text input box opens the video/audio feedback window.
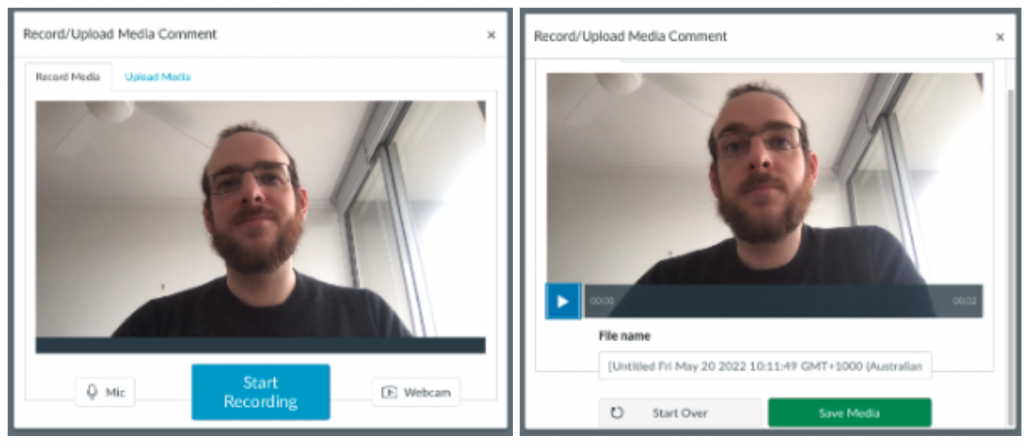
Then select your microphone (left), video feed (right) and press ‘Start Recording’. The screen counts you down before recording starts. Once you hit ‘Finish’ you can save your recording or choose to start over.
If you are using this feature for the first time your browser may prompt you to enable access to your camera/microphone.
Keep in mind:
- Saving the recording: when you hit ‘Save Media’ an outline appears around the button but nothing else appears to happen. While this can be confusing, the video is indeed saving and will continue to do so even if you close the video feedback window. The video will appear in the comments box when this process is complete.
- Microphone connection: sometimes the connection to my microphone would be broken in between recordings. Switching the selected mic to any other option from the dropdown and then back would renew the connection. Regardless, it’s a good practice to ensure that audio is being accepted by checking for the input volume register before starting a recording.
While video feedback was a good step forward for my practice I also decided to experiment with providing a screen share feed for my video recordings.
Screen sharing student work in feedback with Open Broadcaster Software (OBS)
Open Broadcaster Software (OBS) is a free open source tool you can use to combine several visual inputs into a single video feed. While commonly used by live streamers, when used with Canvas OBS can create video feedback that shows student work on screen alongside video from your webcam. This means you can refer to student work in real time while still retaining the personal connection and use of gesture that is key to the humanising element of video feedback. I was keen to experiment with this mode to see how it might change my feedback practice and turn it into a conversation.
Keep in mind:
- Accessibility: once again, it’s essential to consider accessibility. Reach out to the LX.lab for guidance on how you can do this effectively.
- The considerations mentioned above in relation to video feedback itself: this also makes use of the video feedback in Canvas SpeedGrader, so the considerations highlighted above are still relevant to this implementation.
- Appropriate computer power: I happily recorded all my video feedback using OBS, but the higher than usual fan noise showed my computer was working harder than it would with my regular tasks. You may need to try it out and see if your computer is suitable. This is potentially a larger concern if you would like this practice to be performed by your teaching team who may not have access to a suitable system.
Setup for OBS
While OBS has many features, there were only a couple I needed to use to get the I result I wanted:
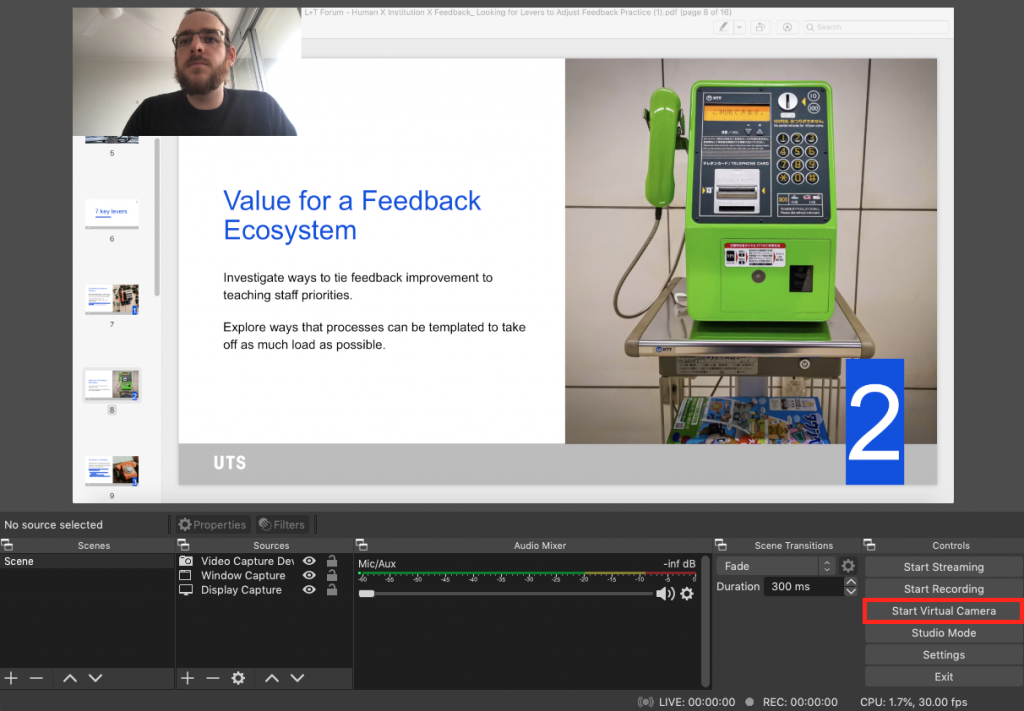
In the ‘Sources’ panel I added a ‘Video capture’ feed and selected my webcam.

I also added a ‘Display capture’ for my second monitor where I would show the student work.
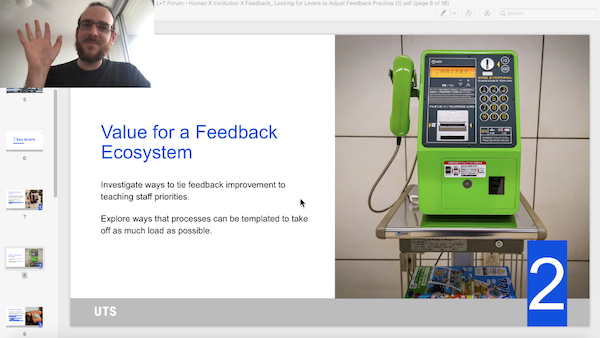
With these elements added to the frame I then just moved and resized them in the preview to show student work as the main feature with a small view of me in the top corner. I then selected ‘Start Virtual Camera’ to turn on the camera feed.
Then from within Canvas I selected the OBS virtual camera feed to replace my regular webcam feed.

And that’s it – press record and you can screen share the student work, gesture and talk to the student by looking at the webcam.
Note: one of the setbacks is that OBS supports a mouse pointer on Mac, so I wasn’t able to gesture with my mouse pointer. I was able to get around this by highlighting text – not perfect, but effective enough for this trial.
What the students thought
I did a quick survey asking students if they had seen their feedback yet, and whether they preferred the video feedback or text feedback.
31 out of my 40 students responded. 23 preferred the video while 3 would rather have had text (I’ll make sure those students get text next time). The remaining five hadn’t reviewed their feedback (1 student) or hadn’t been able to find it (4 students). I then did a quick demo showing where it was in a tutorial.
That’s an 88% preference for video feedback (in a class of predominantly international students).
Ultimately this experiment shows that it’s becoming more straightforward and time effective to create video feedback, which is more meaningful for learners. While accessibility and personal preferences should be kept in mind, these new methods provide further ways to build meaningful learning relationships.
Feature image by Andrew Leu.